In ReachMyTeach all classes are pulled directly from your school’s student information system. You can customize groups. Classes will roster from your SIS, you can learn how to customize them here.
In ReachMyTeach, all classes are automatically pulled from your school’s Student Information System (SIS). While your classes are rostered from the SIS, you also have the option to create, edit, and share your own groups to make communication even easier. To change the name of a pre-rostered class learn more here.
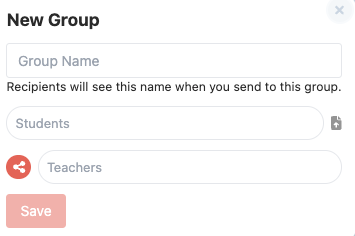
1. Create a New Group
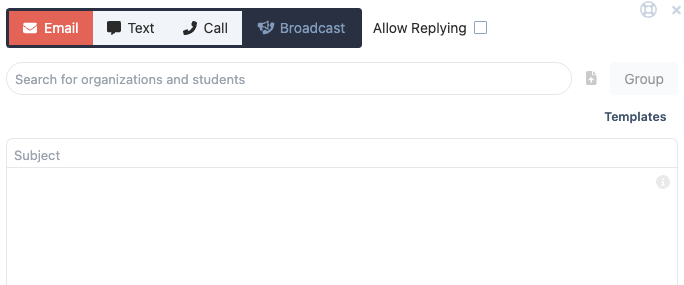
Go to New Message
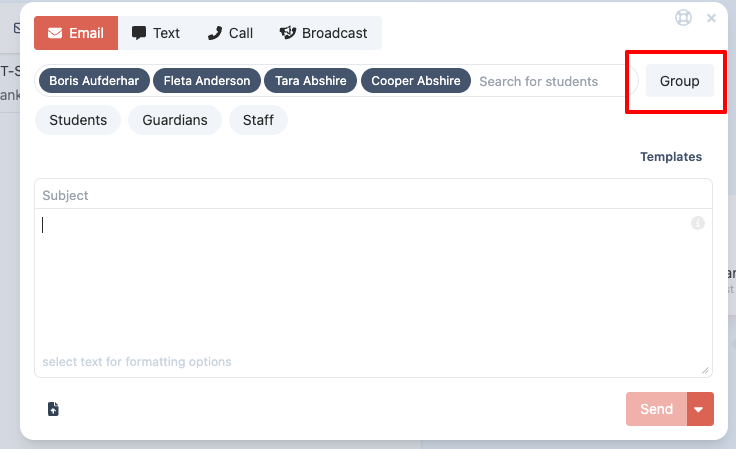
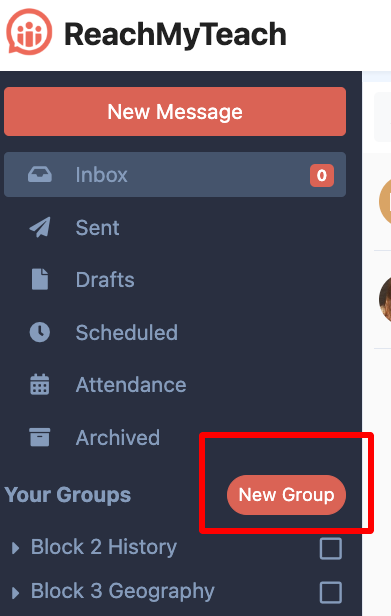
or from the left hand side of the screen select "new group"
Use the search bar to find and select the students you want to include in the group.
You can also copy and paste student names or IDs from another list — up to 100 students at a time (however if you have Broadcast - see below for how to create large groups)
Once you’ve selected your students, click "New Group" on the left-hand side of the screen.
Give your group a name and save it.
- When you’re creating or editing a group, you’ll see a checkbox labeled Show me as a suggested contact for these students:
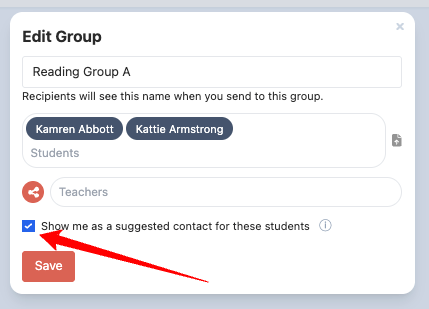
Selecting this means:
- You will appear as a suggested staff member when educators look up these students to send a message.
- Families of these students will see you as a visible contact option when they compose a message in ReachMyTeach.
This is helpful if you work closely with a specific set of students and want to make it easier for both staff and families to reach you directly.
Your new group will now appear in your message view, giving you a quick way to message that set of students and families anytime.
2. Edit a Group
On the left-hand side of your screen (where your classes and groups are listed), locate your group and click the arrow down:

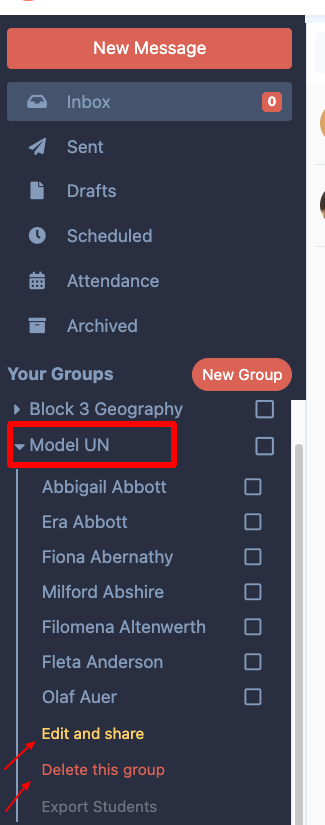
Click the dropdown arrow next to the group name.
Select "Edit this group" to:
Rename the group
Add new students by searching for their names
Remove students by clicking on their name
3. Share a Group
On the left-hand side of your screen (where your classes and groups are listed), locate your group, click the arrow down:
Click the share icon next to the group name

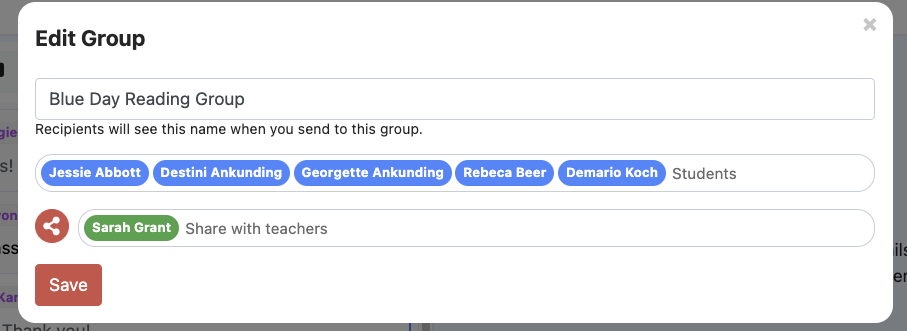
Search for and select the teacher or staff member you’d like to share the group with.
The shared group will now appear in their ReachMyTeach account, allowing them to message the same group easily — perfect for co-teachers, case managers, or support staff.
If “Show me as a suggested contact for these students” is selected for the group, any shared staff members will also appear as suggested contacts when educators message around those students, and may be visible to families as contact options, depending on their role and permissions.

Large Groups
If your district has Broadcast enabled and you have that permission (either you are admin or been given broadcasting permission), you are able to create large groups quickly. You can upload a list of student ids or student emails. This must be a csv, where either the first row is student_id or student_email. After having your csv, you can either:
- create a new group (from your messages homescreen), then click the upload icon:
- If you add a new message and choose broadcast, you will see the same upload icon:
4.Select the checkbox to add your name to the students list of teachers. This will show up when other teachers view a student and also when the guardian uses the app or website.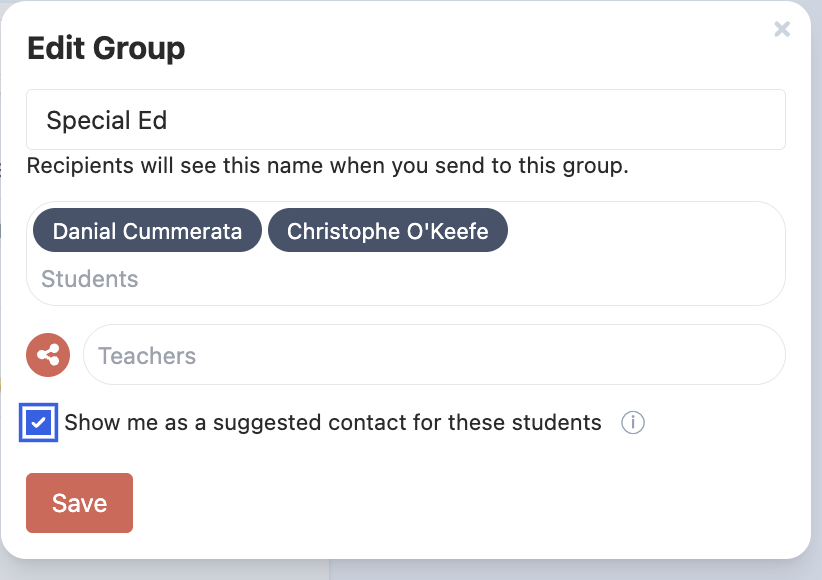
Was this article helpful?
That’s Great!
Thank you for your feedback
Sorry! We couldn't be helpful
Thank you for your feedback
Feedback sent
We appreciate your effort and will try to fix the article