How to Schedule a Message
-
Compose Your Message:
- Begin by crafting your message as usual. Enter the necessary information, including the recipient(s), subject (if applicable), and the content of the message.
-
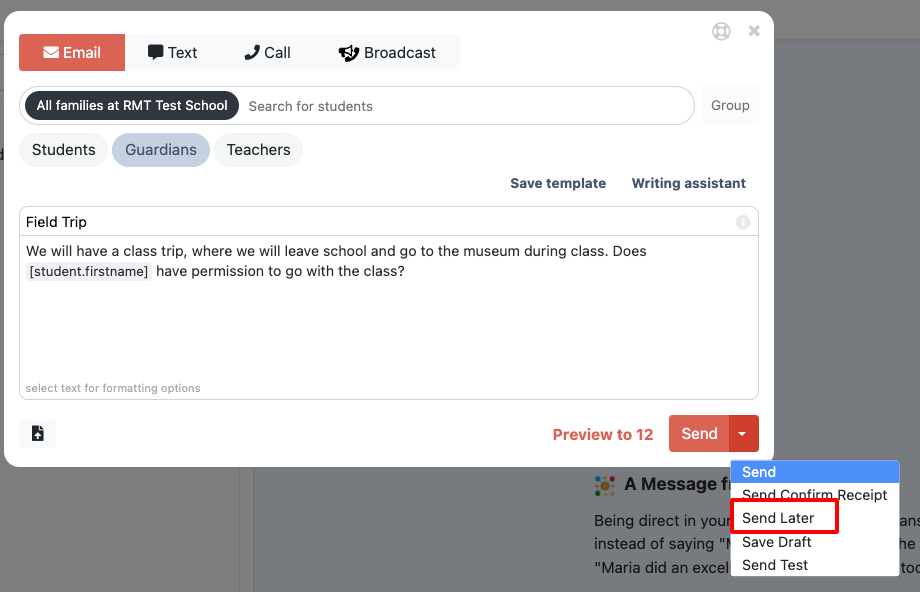
Schedule the Message:
- Look for the "Send" button, and next to it, you’ll see an option to Schedule the message.
- Click on the Schedule option.
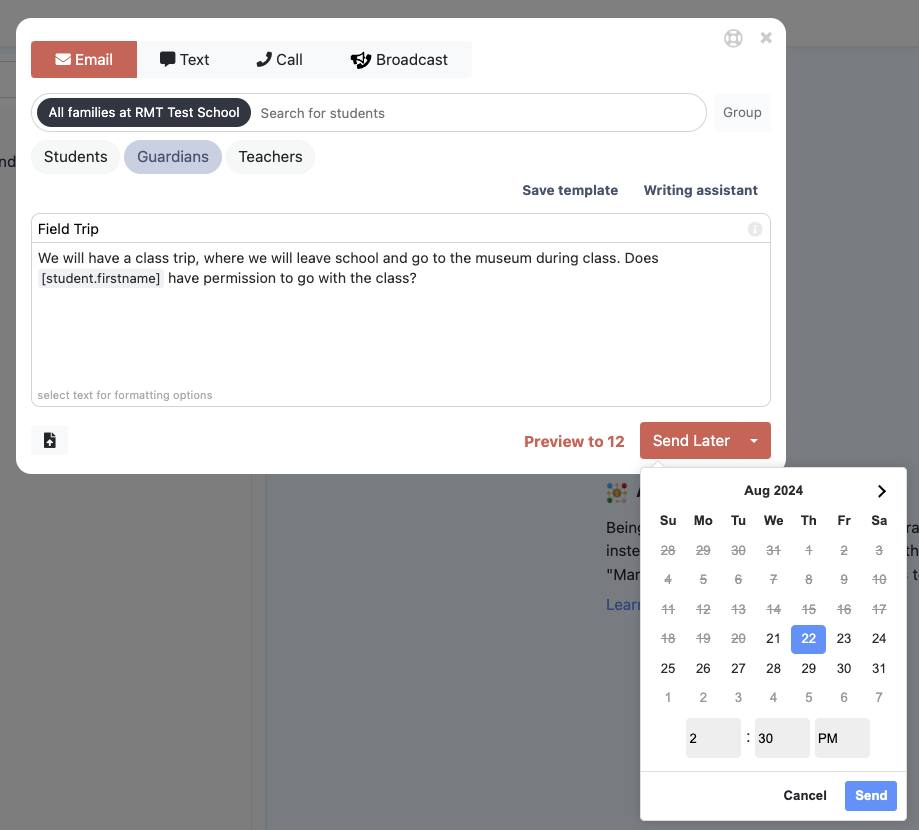
- A calendar or time picker will appear. Select the date and time you want your message to be sent.
- Once you’ve selected the desired time, confirm your scheduling by clicking Schedule Message.
How to Cancel a Scheduled Message
-
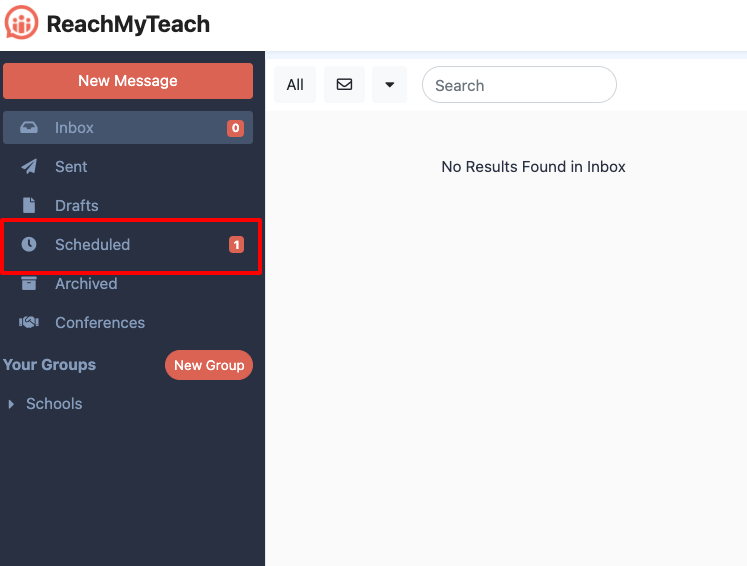
Access Your Scheduled Messages:
- Navigate to the Scheduled folder within your ReachMyTeach account. This is where all your scheduled messages are stored.
-
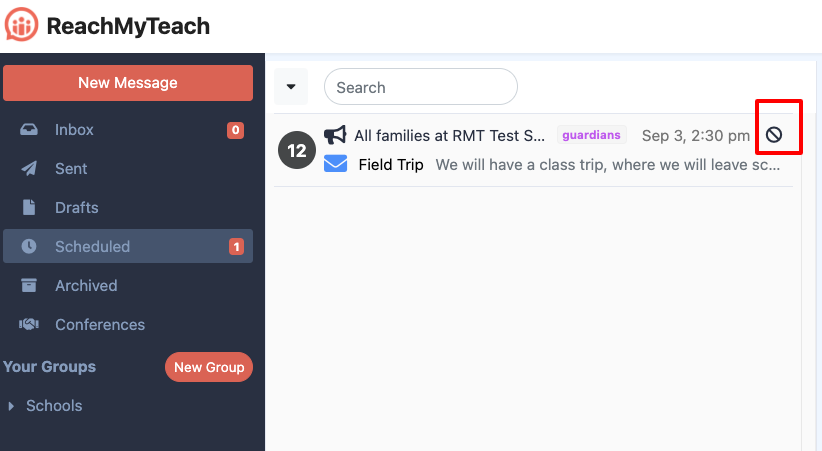
Cancel the Scheduled Message:
- Locate the message you want to cancel.
- Click on the ? Cancel button next to the message.
Was this article helpful?
That’s Great!
Thank you for your feedback
Sorry! We couldn't be helpful
Thank you for your feedback
Feedback sent
We appreciate your effort and will try to fix the article